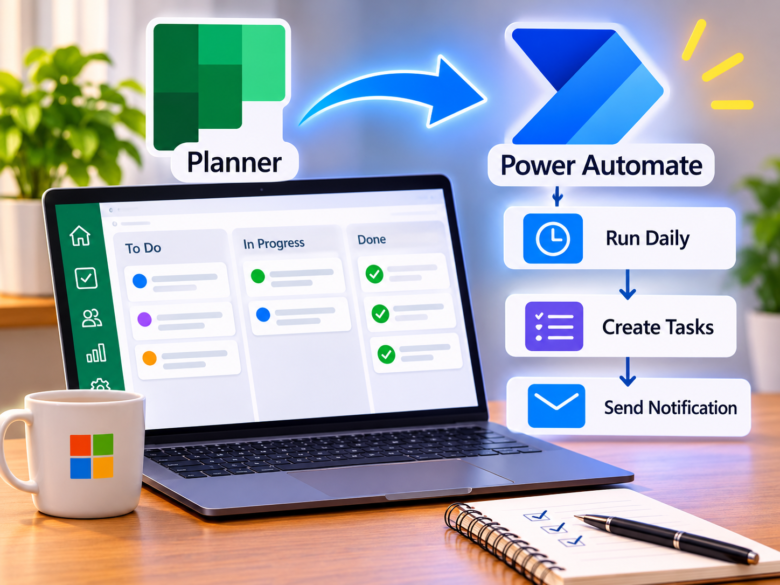
Context switching is the silent killer of enterprise productivity. When project managers and developers are forced to manually bridge the gap between their communication channels (emails, Teams messages, intake forms) and their task management system, they lose hours of deep-work capacity every week to administrative data entry.
Microsoft Planner is an excellent, lightweight Kanban tool deeply integrated into the Microsoft 365 ecosystem. However, manually creating a Planner task every time a client submits a bug report, or a manager flags a high-priority email, is highly inefficient.
By leveraging Microsoft Power Automate (formerly Microsoft Flow), you can intercept data from almost any source and programmatically generate, assign, and categorize tasks in Microsoft Planner without human intervention.
This technical guide will walk you through architecting an enterprise-grade automation pipeline. We will bypass basic templates and build a custom flow that captures structured data from a Microsoft Form, uses expression-based dynamic due dates, updates task details via the Planner API limitations, and implements conditional logic to route urgent tasks to Microsoft Teams.
Step 1: Architecting the Planner Destination (The Database)
Automation systems are incredibly rigid. If you tell Power Automate to put a task in the “Backlog” bucket, but someone manually renames that bucket in Planner to “To Do”, the API connection will break, and your flow will fail.
Before touching Power Automate, you must lock down the architecture of your destination Planner board.
- Open Microsoft Planner (tasks.office.com) and create a new Plan for your team (e.g., “IT Support Desk”).
- Create strict, permanent Buckets. For automated triage, create a dedicated intake bucket named
Incoming Requests. Do not allow users to rename this bucket. - Define your Labels. On the right side of any task card, edit the color labels. Set Red to
Critical Priorityand Yellow toStandard Priority. Power Automate will use these string values later to tag incoming work.
Step 2: Designing the Trigger (Microsoft Forms)
To prevent messy, unstructured tasks, you should avoid using plain emails as a trigger whenever possible. Emails contain massive signature blocks, forwards, and inline images that clutter Planner task descriptions.
Instead, use Microsoft Forms as a structured data intake portal.
- Open Microsoft Forms and create a form named
Task Intake Portal. - Create the following fields:
- Task Title (Short text, Required)
- Detailed Description (Long text, Required)
- Is this an urgent request? (Choice: Yes/No, Required)
Because this form is internal to your Microsoft 365 tenant, it automatically captures the responder’s Active Directory email address, which we will use to dynamically assign tasks.
Step 3: Initiating the Power Automate Flow
Now, we bridge the gap between the Form and Planner.
- Log into Power Automate (make.powerautomate.com).
- On the left sidebar, click Create, then select Automated cloud flow.
- Name your flow
Forms Intake to Planner Pipeline. - In the trigger search bar, select When a new response is submitted (Microsoft Forms) and click Create.
Extracting the Form Data
The initial trigger only tells Power Automate that a form was submitted; it does not contain the actual answers. You must fetch the data payload manually.
- Click New step.
- Search for Microsoft Forms and select the action Get response details.
- In the Form Id dropdown, select your
Task Intake Portal. - In the Response Id field, click the dynamic content popup and select the
Response Idgenerated by the trigger above it.
Step 4: Creating the Planner Task & Calculating Dynamic Dates
Now we command Planner to generate the card.
- Click New step, search for Planner, and select Create a task.
- Group Id: Select the Office 365 Group associated with your Planner board.
- Plan Id: Select the specific Plan (
IT Support Desk). - Title: Use the dynamic content popup to map the answer from the form question:
Task Title. - Bucket Id: Select the
Incoming Requestsbucket you prepared in Step 1.
Writing the Due Date Expression
You cannot simply type “Tomorrow” into the Due Date Date/Time field. Power Automate requires strict ISO 8601 timestamp formats (e.g., 2024-11-02T12:00:00Z). To assign a due date dynamically based on the moment the form is submitted, you must write a custom WDL (Workflow Definition Language) expression.
Click inside the Start Date/Time field, switch from the Dynamic Content tab to the Expression tab, and enter this exact formula to set the start date to right now:utcNow()
Next, click inside the Due Date/Time field, switch to the Expression tab, and enter this formula to set the deadline to exactly 3 days from the current moment:addDays(utcNow(), 3)
Click OK to save the expressions into the fields. They will appear as pink function pills.
Step 5: Bypassing the Planner API Description Limitation
A long-standing quirk of the Microsoft Graph API (which powers this integration) is that the “Create a task” module does not allow you to populate the task’s Description field. The creation of the card and the updating of its internal details are separated into two distinct API calls.
To add the user’s detailed description to the task, we must add a secondary action.
- Click New step and search for Update task details (under Planner).
- In the Task Id field, do not use the dropdown. Instead, click Enter custom value and select the
Iddynamic content pill generated by the Create a task module above it. This tells the flow exactly which task to edit. - In the Description field, map the
Detailed Descriptionanswer from your Form data. You can also type static text here, such as:Submitted by: [Responder's Email]Details: [Detailed Description]
Step 6: Implementing Advanced Conditional Logic
A flat automation is helpful, but an intelligent automation scales. We want the system to read the urgency of the task and react accordingly. If the user marked the task as “Urgent” on the form, we want the flow to tag the card with a Red label and instantly ping the IT team in Microsoft Teams.
- Click New step and search for Condition (under Control).
- The canvas will split into an “If Yes” and “If No” branch.
- In the condition configuration box, set the left value to the dynamic content:
Is this an urgent request? - Set the operator to is equal to.
- Set the right value to type
Yes.
Configuring the “If Yes” Branch
If the condition is met, we execute two simultaneous actions.
- Inside the If Yes box, click Add an action. Search for Update a task V2 (Planner).
- Map the Task Id just like before (using the custom
Idfrom the creation step). - Scroll down to the Pink Category (or whichever color you designated for Urgent in Step 1) and change the dropdown to Yes. This applies the visual label to the Kanban card.
- Click Add an action again, directly below the task update. Search for Microsoft Teams and select Post message in a chat or channel.
- Post as Flow bot, Post in Channel. Select your IT Support Team and General channel.
- Draft the alert message:
🚨 URGENT TASK LOGGED: [Task Title]Link to Task: [Link to Task](Use dynamic content to map the direct URL).
Configuring the “If No” Branch
If the request is not urgent, simply leave the “If No” branch completely blank. The flow will silently finish processing, leaving the standard-priority task sitting quietly in the Incoming Requests bucket for normal triage.
Click Save in the top right corner. Use the Test function (top right) to trigger the flow manually, submit a dummy form, and watch your fully automated, zero-touch Planner task materialize with dynamic dates, descriptions, and conditional Teams routing.
Frequently Asked Questions
1. Why am I getting a “User not found” error when trying to map the “Assigned User IDs” field?
Microsoft Planner requires the user’s specific Azure Active Directory (AAD) Object ID or User Principal Name (UPN) to assign a task. If you are mapping a plain text name (e.g., “John Doe”) instead of an email address (john.doe@company.com), the API will fail. Ensure your form captures the responder’s actual email, and map that email to the Assigner field.
2. Can I automate tasks from external systems like Jira, Zendesk, or generic emails?
Yes. Power Automate connects to over 1,000 premium and standard connectors. You can replace the Microsoft Forms trigger in Step 3 with a “When a new email arrives in a shared mailbox” trigger, or a “When an issue is updated in Jira” premium trigger. The rest of the Planner architecture remains exactly the same.
3. Does this workflow require a Premium Power Automate license?
No. Microsoft Forms, Microsoft Planner, Microsoft Teams, and the Office 365 Outlook connectors are all classified as “Standard” connectors. This entire enterprise automation can be built and executed using the base Power Automate license included with standard Microsoft 365 E3, E5, and Business Premium subscriptions.
4. Can I upload file attachments from the Form directly into the Planner task?
No, not natively. Planner task attachments are technically stored in the underlying SharePoint Document Library of the Office 365 Group. To attach a file submitted via Forms, your flow must first capture the file, save it to a SharePoint folder or OneDrive using the “Create File” action, generate a sharing link, and then append that sharing link into the Planner task Description.
Sources and References
- Microsoft Learn Documentation: Create a task in Planner using Power Automate.
- Power Automate Community Forums: Using WDL Expressions for Dates and Times (addDays, utcNow).
- Microsoft Graph API Reference: PlannerTask resource type limitations and update methodologies.