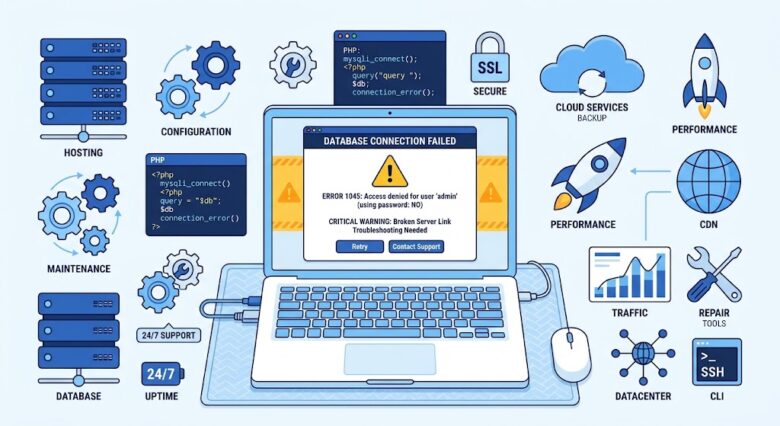
The “Error Establishing a Database Connection” is one of the most critical and common issues WordPress administrators face. Unlike minor formatting glitches or plugin conflicts, this error completely takes your website offline. When this happens, WordPress is unable to communicate with the MySQL database, meaning it cannot retrieve the content, user data, or site settings required to render your web pages.
This error typically stems from one of three primary causes: incorrect login credentials in your configuration file, a corrupted database, or an unresponsive database server. Resolving this issue requires backend access to your web hosting control panel (cPanel) and a systematic approach to troubleshooting.
This comprehensive guide will walk you through diagnosing and fixing the database connection error using the cPanel File Manager and phpMyAdmin. By following these steps, you can safely restore your website’s functionality without losing any data.
Prerequisite: Always Backup Before Troubleshooting
Before modifying core files or database tables, it is imperative to generate a full backup of your current site state. Even if the database is currently inaccessible to WordPress, the physical files remain on your server.
- Log into your hosting account’s cPanel.
- Navigate to the Files section and open the Backup Wizard.
- Select Back Up and choose Full Backup to generate a compressed archive of your home directory, MySQL databases, and email forwarders. Save this backup locally. If any troubleshooting step results in further corruption, this archive acts as your fail-safe.
Step 1: Verify the Database Credentials in wp-config.php
The most frequent cause of database connection errors is a mismatch between the MySQL database credentials and the credentials stored in your WordPress configuration file. This often occurs after migrating a website, changing hosting providers, or manually modifying database users.
WordPress relies on a specific file named wp-config.php to establish the connection.
To inspect these credentials:
- Inside cPanel, go to the Files section and click on File Manager.
- Navigate to your website’s root directory, typically named
public_html. - Locate the
wp-config.phpfile. Right-click on it and select Edit. - Scroll down until you find the MySQL settings section, which looks like this:
PHP
// ** MySQL settings - You can get this info from your web host ** //
/** The name of the database for WordPress */
define( 'DB_NAME', 'your_database_name' );

/** MySQL database username */
define( 'DB_USER', 'your_database_username' );

/** MySQL database password */
define( 'DB_PASSWORD', 'your_database_password' );

/** MySQL hostname */
define( 'DB_HOST', 'localhost' );
Leave this tab open. You now need to verify that these four values (DB_NAME, DB_USER, DB_PASSWORD, DB_HOST) exactly match the active database on your server.
Step 2: Cross-Reference Credentials in MySQL Databases
To ensure the wp-config.php file contains the correct data, you must cross-reference it with the actual database settings in your hosting environment.
- Open a new tab, return to the main cPanel dashboard, and locate the Databases section.
- Click on MySQL Databases.
- Scroll down to the Current Databases table. Here, you will see a list of all databases hosted on this account.
- Identify the database associated with your WordPress site. Compare its exact name with the
DB_NAMEvalue in your openwp-config.phptab. Ensure there are no typos, missing prefixes (many hosts automatically add a prefix likeusername_to the database name), or trailing spaces. - Next, look at the Privileged Users column next to your database name. This user must exactly match the
DB_USERin your configuration file.
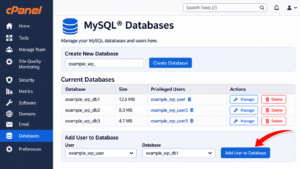
If the user is missing, scroll down to the Add User to Database section. Select the correct user from the first dropdown, the correct database from the second dropdown, and click Add. On the next screen, assign All Privileges to the user and save the changes.
If the database name and username are correct, the issue is likely the password. You cannot view the existing password in cPanel for security reasons. Instead, you must reset it:
- On the same MySQL Databases page, scroll down to Current Users.
- Click Change Password next to the relevant database user.
- Generate a strong password, copy it, and save the changes.
- Go back to your
wp-config.phptab and paste the new password exactly within the single quotes forDB_PASSWORD. - Save the
wp-config.phpfile and reload your website. If the site loads, the issue was an incorrect password. If the error persists, proceed to the next step.
Step 3: Check the DB_HOST Value
The DB_HOST defines where the database server is located relative to the web server. In 95% of shared hosting environments, this value should be set to localhost. This means the database is hosted on the same physical server as your website files.
However, some premium hosting providers (like AWS, Google Cloud, or specialized managed WordPress hosts) separate the database and web servers to improve performance. If your host uses a separate database server, localhost will fail.
To fix this, check your hosting provider’s documentation or contact their support to get the specific IP address or URL for your MySQL server. Replace localhost in your wp-config.php file with that specific address.
Step 4: Repairing a Corrupted Database Using phpMyAdmin
If your credentials are 100% correct but the error persists, your MySQL database tables might be corrupted. Corruption can occur due to server crashes, interrupted plugin updates, or exhausting your server’s memory limits. Fortunately, MySQL includes built-in repair tools accessible via phpMyAdmin.
Here is how to repair your database manually:
- Return to the cPanel dashboard.
- In the Databases section, click on phpMyAdmin. This will open a new interface for managing your databases visually.
- In the left-hand sidebar of phpMyAdmin, click on the name of your WordPress database. The main panel will populate with a list of your WordPress tables (such as
wp_posts,wp_options,wp_users, etc.). - Scroll to the very bottom of the table list. Check the box that says Check all to select every table in the database.
- Click on the dropdown menu right next to it that says With selected:.
- Under the Table maintenance header in the dropdown, select Repair table.
phpMyAdmin will now execute a REPAIR TABLE SQL query across your entire database. It will display a success screen showing the status of each table. Once completed, clear your browser cache and reload your website.
Alternative Method: Using WP_ALLOW_REPAIR
If you cannot access phpMyAdmin or prefer an automated approach, WordPress has a hidden repair script.
- Open your
wp-config.phpfile in the File Manager. - Add the following line of code just before the line that says
/* That's all, stop editing! Happy publishing. */:define( 'WP_ALLOW_REPAIR', true ); - Save the file.
- Open a new browser tab and navigate to:
[https://yourwebsite.com/wp-admin/maint/repair.php](https://yourwebsite.com/wp-admin/maint/repair.php)(replaceyourwebsite.comwith your actual domain name). - You will see a screen with two buttons. Click Repair and Optimize Database.
- Wait for the script to finish.
- Crucial Security Step: Once the repair is done, immediately remove the
define( 'WP_ALLOW_REPAIR', true );line from yourwp-config.phpfile. Leaving this active allows anyone to trigger database repairs without logging in, which is a major security vulnerability.
Step 5: Diagnosing Database Server Outages
If you have verified the credentials and attempted a database repair, yet the error remains, the problem is likely at the server level.
Web hosting providers allocate specific resources (RAM, CPU) to shared hosting accounts. If your website receives a sudden spike in traffic, or if a poorly coded plugin creates an infinite loop, your account can exceed its allowed resources (often resulting in a 508 Resource Limit Reached error alongside the database failure). When this happens, the hosting server automatically shuts down your MySQL processes to protect other users on the shared node. Alternatively, the hosting provider might be conducting unannounced server maintenance, or the MySQL service on their end has crashed.
At this stage, you must contact your web hosting support team. Provide them with the exact troubleshooting steps you have already taken:
- “I am receiving an Error Establishing a Database Connection.”
- “I have verified that the DB_NAME, DB_USER, and DB_PASSWORD in wp-config.php match the active MySQL database.”
- “I have assigned All Privileges to the user.”
- “I attempted to repair the tables via phpMyAdmin but the database is unresponsive.”
Providing this technical context allows tier-1 support agents to immediately escalate your ticket to server administrators, drastically reducing your downtime.
Frequently Asked Questions
1. Will repairing the database via phpMyAdmin delete my posts or pages?
No. The REPAIR TABLE function in MySQL only fixes corrupted index structures and broken data pointers. It does not overwrite or delete your actual content, media, or user data. However, taking a backup beforehand is always recommended as a best practice.
2. Why did my database credentials change on their own?
Credentials do not change automatically. This usually happens if your hosting provider migrates your account to a new server, if a security plugin modifies your configuration, or if your site was compromised by malware. It can also occur if you restored an old backup containing outdated wp-config.php data.
3. Can a faulty plugin cause a database connection error?
Yes. While rare, a poorly coded plugin can generate excessive SQL queries that overload the MySQL server, causing it to crash and drop the connection. To test this, access your File Manager, navigate to wp-content, and rename the plugins folder to plugins_old. If the site loads, a plugin is the culprit.
4. What is the difference between localhost and an IP address in DB_HOST?
localhost tells WordPress that the database is on the exact same server as the WordPress files. An IP address is required when your hosting company uses a distributed architecture, keeping web files on one server and databases on a completely separate, dedicated database server.
Sources and References
- WordPress.org Official Codex: Debugging a WordPress Network and Database Errors.
- MySQL Documentation: Table Maintenance and REPAIR TABLE Syntax.
- cPanel & WHM Knowledge Base: Managing MySQL Databases and Users.