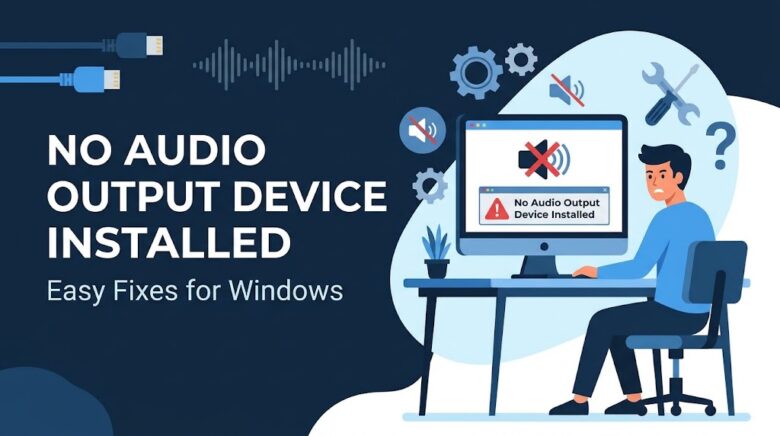
Few things are more frustrating than settling down at your PC to watch a video, play a game, or hop onto a video call, only to realize your system is completely silent. To make matters worse, you look down at your taskbar and see a tiny red “X” over the speaker icon. Hovering your mouse over it reveals the dreaded message: “No Audio Output Device Installed.”
In simple terms, this error means your Windows operating system cannot communicate with your speakers, headphones, or any other sound equipment. While this can seem like a major hardware failure, it is almost always caused by software glitch, corrupted drivers, an ignored Windows Update, or incorrect device settings.
The good news is that you do not need to be a PC expert to fix this problem. Below is a comprehensive, step-by-step troubleshooting guide to get your sound back up and running.
Step 1: Check Your Physical Connections First
Before diving deep into software settings, let’s rule out any hardware oversights. Even if you think everything is plugged in, a loose connection can often trick Windows into thinking no output device is installed.
- For External Speakers or Headphones: Unplug your audio jack (typically the 3.5mm green port) or USB cable, and plug it back in firmly. Make sure it is in the correct port; sometimes back panels have multiple jacks, and inserting a speaker plug into a microphone port will cause this error.
- Test Another Port: If your headset is USB-based, try connecting it to a different USB port, preferably on the back of the motherboard if you use a desktop PC.
- Bluetooth Devices: Ensure your Bluetooth headphones or speakers are powered on and paired. Try disabling and re-enabling Bluetooth on your PC to refresh the connection.
- Power Check: Ensure external speakers have their power cables connected to an active outlet and are switched on. Also, verify that the physical volume dial on the device is turned up.
Step 2: Run the Built-in Windows Audio Troubleshooter
Windows comes equipped with several automated troubleshooters that can scan your system, diagnose faults, and resolve them without requiring any complex input.
For Windows 11 Users:
- Press Windows Key + I to open the Settings menu.
- In the System tab, scroll down and click on Troubleshoot.
- Select Other troubleshooters.
- Locate the Audio troubleshooter (or “Playing Audio”) and click the Run button next to it.
- Follow any on-screen prompt to apply standard automated fixes.
For Windows 10 Users:
- Open the Settings app and navigate to Update & Security.
- Click on the Troubleshoot tab in the left sidebar, followed by Additional troubleshooters.
- Select Playing Audio and click Run the troubleshooter.
Windows will attempt to restart audio services, test driver integrity, and ensure your system points to the correct hardware. If it finds an issue, it will apply the resolution automatically or ask for your permission to reboot.
Step 3: Enable Disabled or Invisible Audio Devices
Sometimes, Windows or a third-party application will disable your playback devices without your knowledge, making them look completely “missing” to the OS.
To verify whether your audio devices are just hidden or disabled:
- Press Windows Key + R to launch the Run dialog, type
mmsys.cpl, and hit Enter. This launches the traditional Sound Control Panel. - Go to the Playback tab.
- Right-click anywhere in the empty white space inside the tab and verify that both Show Disabled Devices and Show Disconnected Devices have checkmarks next to them.flat vector illustration of the Windows Sound Control Panel UI, highlighting hidden and disabled audio devices with clickable checkmarks, modern flat vector aesthetic, troubleshooting tutorial style
- If any disabled devices (like speakers, headphones, or HDMI displays) appear now, right-click on them and select Enable.
- Select the device you want to use and click the Set Default button at the bottom of the window.
- Click Apply and then OK.
If nothing appears even after enabling these toggles, your hardware drivers are likely missing, outdated, or corrupted.
Step 4: Reinstall or Update Your Audio Drivers
A corrupted, missing, or outdated audio driver is the single most common reason you will see this specific error on Windows. Drivers act as translators, and if a driver is corrupted, Windows will fail to acknowledge your audio hardware.
Option A: Let Windows Search for Drivers Automatically
- Press the Windows Key + X and select Device Manager from the pop-up menu.
- In Device Manager, scroll down and double-click Sound, video and game controllers to expand the category.
- Look for your default sound device (typically labeled Realtek High Definition Audio, Intel High Definition Audio, or similar). If you do not see it, or if it has a yellow warning triangle, move on to Option B.
- Right-click on your audio card and select Update driver.
- Choose Search automatically for drivers. If Windows finds a newer version, it will download and install it.
Option B: Perform a Fresh Reinstallation
If Windows says you already have the best driver installed, the existing file might simply be corrupted. Reinstalling is a quick, painless solution:
- In Device Manager, right-click your audio device under Sound, video and game controllers and select Uninstall device.
- When the confirmation box pops up, check the box that says Attempt to remove the driver for this device (if visible) and click Uninstall.
- Important: Your sound might disappear completely or continue displaying the Red X, but do not panic.
- At the top of the Device Manager window, click on the Action menu and select Scan for hardware changes.
- Windows will scan your motherboard, realize it has an unclaimed audio chip, and automatically reinstall a fresh, working copy of the default driver. Alternatively, simply restarting your computer will prompt Windows to restore the device on reboot.
Step 5: Address Drivers Under System Devices
Occasionally, the culprit isn’t your direct speaker driver; instead, it is your motherboard’s Sound Technology Controller that is failing, meaning your system cannot detect any sound devices down the line.
- Open Device Manager.
- Scroll to the bottom and double-click to expand System devices.
- Look for Intel(R) Smart Sound Technology (Intel(R) SST) Audio Controller or any other device ending in “Audio Controller”.
- If you see this device, or if it has a yellow exclamation mark, right-click it and choose Update driver.
- Select Browse my computer for drivers, followed by Let me pick from a list of available drivers on my computer.
- Select High Definition Audio Controller (or the most standard, generic option listed) and click Next to overwrite any malfunctioning Intel Smart Sound Technologies that are blocking the hardware. Reboot your PC.
Step 6: Restart Essential Windows Audio Services
Your audio needs various Windows services running quietly in the background to send signals to your speakers. If these background services fail to start up, crash, or get disabled by optimization software, your audio will flatline.
You can manually trigger these back to life:
- Press Windows Key + R, type
services.msc, and press Enter to launch the Windows Services Manager. - Scroll down and locate Windows Audio.
- Check the “Status” column. If it is empty or does not say “Running”, right-click Windows Audio and choose Start (or Restart if it was already running).
- Right-click it again, select Properties, and ensure the Startup type is set to Automatic. If it is set to “Manual” or “Disabled”, change it.
- Repeat these exact same steps for three other crucial services:
-
-
Windows Audio Endpoint Builder
-
Multimedia Class Scheduler (if listed)
-
Remote Procedure Call (RPC)
-
Once completed, close the Services window and test your volume.
Step 7: Repair Corrupted System Files with SFC and DISM
If your drivers and services appear to be in order but Windows still refuses to interact with your audio equipment, there may be deep system corruption from an improper update or sudden shutdown.
To fix this, you can utilize the built-in Command Prompt tools to scan, verify, and automatically repair any compromised Windows core files:
- Type
cmdinto the Windows search bar, right-click on Command Prompt, and select Run as administrator. - Input the following command and press Enter:
sfc /scannow - Wait for this scan to finish (this can take 5 to 15 minutes). If Windows files are missing or broken, SFC will identify and repair them.
- If the issue remains after a reboot, open the admin Command Prompt again, type the following command, and press Enter:
DISM /Online /Cleanup-Image /RestoreHealth - This tool will connect to the internet to download official copies of corrupted Windows resources. Once complete, restart your machine.
Frequently Asked Questions
1. Why does it say “No Audio Output Device Installed” after a Windows update?
Windows updates sometimes alter registries or install mismatched generic hardware drivers that clash with your PC’s specific components. In this case, reinstalling your manufacturer’s specific audio driver or rolling back the update is usually the best fix.
2. How do I know if my audio hardware is physically broken?
To rule out a hardware failure, try plugging in USB or 3.5mm headphones. If they work, your internal speakers or jacks may be damaged. You can also boot your PC using a live bootable USB (like Ubuntu) to check if sound plays, or use an external USB-to-3.5mm adapter to bypass the motherboard’s built-in sound chip.
3. What is Intel Smart Sound Technology, and why does it cause sound errors?
Intel SST is designed to process audio efficiently, but its driver frequently experiences compatibility issues on certain laptops. Disabling or reverting the Intel SST driver in Device Manager (under System Devices) and replacing it with the standard Windows High Definition Audio Controller is a widely known fix for this.
4. What if Device Manager does not show “Sound, video and game controllers”?
If this category is missing entirely, check the Action tab in Device Manager and click Scan for hardware changes. If it still doesn’t appear, ensure the audio controller isn’t disabled in your computer’s BIOS/UEFI settings, as this will prevent Windows from knowing it exists.
5. Can a malware infection cause this error?
Yes. Certain types of malware or intrusive security programs can damage or uninstall audio drivers, or block the Windows Audio background services. Run a full system scan with Windows Defender or a reputable third-party antivirus to ensure your computer is clean.
Sources & References
- Microsoft Support: Fix sound or audio problems in Windows
- Realtek Semiconductor Corp: Driver Downloads and User Resources.
- Intel Support: Disabling and Updating Smart Sound Technology (SST).
- Community Forums: Microsoft Community and Reddit r/techsupport.