Operating system updates are essential for patching security vulnerabilities, adding new features, and improving overall system stability. However, Windows 11 updates do not always go as planned. You might experience a drop in system performance, hardware incompatibility, failing drivers, or even the dreaded Blue Screen of Death (BSOD) immediately following an update installation. When these issues occur, rolling back the update is often the most effective troubleshooting step.
This comprehensive guide details the safest methods to uninstall recent Windows 11 updates without risking your personal files, documents, or media. Depending on whether you recently installed a major feature upgrade or a smaller cumulative patch, the correct approach will vary.
Understanding Windows 11 Updates and the Rollback Process
Before making changes to your system architecture, it is helpful to understand the two primary types of updates Microsoft deploys for Windows 11:
1. Feature Updates (Major Upgrades): These are massive system overhauls released typically once a year (such as the 22H2, 23H2, or 24H2 updates). They introduce major UI changes, new core applications, and structural shifts. Because they replace core system files, rolling back a feature update requires a specific recovery tool. Windows stores the previous version in a “Windows.old” folder for a limited time (usually 10 days).
2. Quality and Cumulative Updates (Minor Patches): These are released frequently—often on “Patch Tuesday” (the second Tuesday of every month). They include security fixes, minor bug resolutions, and internal tweaks. These do not create a Windows.old folder and can generally be uninstalled at any time through the standard Windows Update menu.
While the built-in rollback tools are explicitly designed to leave your personal files (like documents, photos, and downloads) untouched, any operation modifying system registries carries a marginal risk.
Essential Preparation: Securing Your Data
Even though rolling back an update is a standard procedure that preserves personal files, unforeseen power outages, corrupted drives, or software conflicts during the rollback can result in data loss. Before proceeding with any of the methods below, you must secure your essential files.
1. Local and Cloud Backups: The quickest way to secure your data is by utilizing cloud synchronization. Verify that Microsoft OneDrive, Google Drive, or Dropbox has successfully synced your Desktop, Documents, and Pictures folders. If you have large files, such as video projects or virtual machines, connect an external hard drive or SSD and manually copy these files over.
2. Application Data Awareness: It is critical to note that while a rollback protects your personal files, it may reverse changes made to software applications. If you installed a new application or updated an existing software suite after the Windows 11 update, those installations might be undone. You may need to reinstall those specific applications once the rollback is complete.
Method 1: Reverting a Major Feature Update Using ‘Go Back’
If you recently upgraded to a new major version of Windows 11 (or upgraded from Windows 10 to Windows 11) and are experiencing critical bugs, you can revert to the previous build. This method relies on the Windows.old folder and is only available for a strict 10-day window after the upgrade.
Follow these exact steps to initiate the reversion:
- Access System Settings: Press the
Windows Key + Isimultaneously to open the main Settings application. - Navigate to System Recovery: In the left-hand sidebar, ensure you are on the System tab. Scroll down on the right side and click on Recovery.
- Locate the Go Back Option: Under the “Recovery options” section, look for a button labeled Go back. If this button is grayed out or missing, it means the 10-day window has expired, or the system storage cleanup utility has already deleted the previous version files.
- Initiate the Process: Click the Go back button. A blue prompt will appear asking why you are reverting. Select a reason (or provide feedback) and click Next.
- Bypass Check for Updates: Microsoft will offer to check for newer updates to fix your problem. Click No, thanks.
- Review the Warnings: The system will remind you that you might need to reinstall some apps and that you should know your password (as biometric logins might reset). Click Next through these prompts, and finally select Go back to earlier build.
Your PC will restart multiple times during this process. Do not interrupt the power supply until you are back at the Windows login screen.
Method 2: Uninstalling Quality and Cumulative Updates
If your issues began after a routine monthly security patch or a minor bug fix, you do not need to perform a full system rollback. You can simply remove the specific patch that is causing the malfunction.
- Open Windows Update Settings: Press
Windows Key + Iand select Windows Update from the bottom of the left sidebar. - View Update History: Click on Update history to see a comprehensive list of all recently installed patches, drivers, and definition updates.
- Access Uninstall Options: Scroll to the very bottom of the Update history page and click on Uninstall updates under the “Related settings” header.
- Identify the Culprit: You will see a list of installed updates, typically formatted as “Security Update for Microsoft Windows (KBXXXXXXX)”. Look at the installation dates to identify which update coincides with the start of your computer’s performance issues.
- Uninstall: Click the Uninstall button next to the problematic update. Confirm the action when prompted.
- Restart Your PC: Once the uninstallation bar completes, restart your computer to apply the changes and flush the system cache.
Method 3: Utilizing System Restore Points
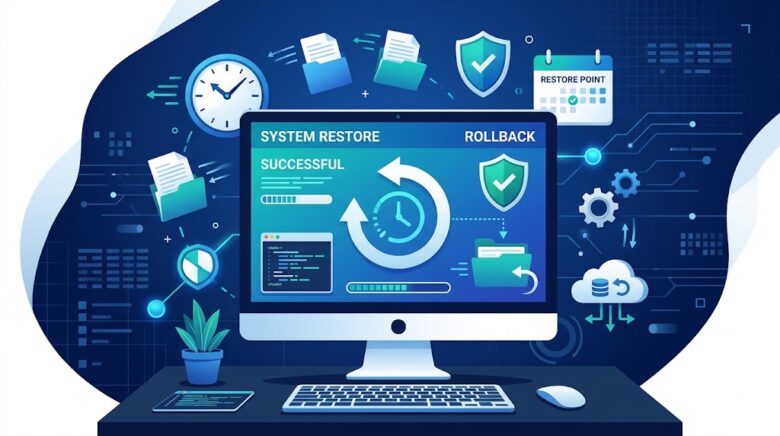
System Restore is a legacy Windows feature that takes “snapshots” of your system registry, driver configurations, and system files at specific points in time. If you had System Restore enabled prior to the problematic update, this is one of the safest ways to revert your computer’s state.
- Open the Restore Utility: Press the
Windows Key, type Create a restore point, and press Enter. This opens the System Properties dialog box on the System Protection tab. - Launch System Restore: Click the System Restore… button.
- Select a Point in Time: Click Next on the introductory screen. You will be presented with a list of available restore points. Check the box that says Show more restore points if available. Look for a restore point created immediately before the Windows Update event.
- Scan for Affected Programs: Select the desired restore point and click the Scan for affected programs button. This will show you exactly which applications or drivers will be uninstalled or restored. Review this carefully.
- Confirm and Execute: Close the scan window, click Next, and then click Finish. Your computer will reboot and begin restoring the registry and system files to the exact state they were in on that date.
System Restore guarantees that files stored in your User folders (Documents, Desktop, Music) are completely ignored during the reversion, making it an exceptionally safe method.
Method 4: Advanced Recovery via Windows Recovery Environment (WinRE)
In severe cases, a flawed Windows 11 update might cause an endless boot loop, preventing you from reaching the desktop to use the settings menus. When this happens, you must rely on the Windows Recovery Environment (WinRE).
- Access WinRE: If Windows fails to boot three times in a row, WinRE will launch automatically. Alternatively, if you can reach the lock screen, hold down the Shift key while clicking the Power icon and selecting Restart.
- Navigate the Recovery Menu: On the blue “Choose an option” screen, select Troubleshoot.
- Open Advanced Options: Click on Advanced options.
- Select Uninstall Updates: Click on Uninstall Updates. You will be presented with two choices: Uninstall latest quality update or Uninstall latest feature update.
- Execute the Removal: Choose the appropriate option based on what was recently installed, confirm your administrator account password if prompted, and allow the system to remove the update from outside the standard operating system environment.
Post-Rollback Actions: Preventing Reinstallation
Windows 11 is designed to automatically download and install updates in the background. If you roll back an update but do not pause the update service, Windows will simply reinstall the broken update the next day, putting you back at square one.
To prevent this, you must pause updates until Microsoft releases a patched version:
- Go to Settings > Windows Update.
- Look for the Pause updates section.
- Click the dropdown menu and select to pause updates for anywhere from 1 to 5 weeks.
For a more permanent solution for a specific broken patch, you can download the “Show or hide updates” troubleshooter tool (wushowhide.diagcab) directly from Microsoft’s official download repository. Running this tool allows you to select a specific KB update and hide it, preventing Windows from ever attempting to install that specific version again.
Frequently Asked Questions
1. Will rolling back an update delete my personal photos and documents?
No. Both the “Go back” feature and the “Uninstall updates” features are designed to exclusively target system files, registry entries, and core OS data. Your personal files located in your user directories remain completely untouched. However, maintaining a backup is always recommended as a fail-safe against power interruptions.
2. Why is the “Go back” button grayed out in Windows 11?
The “Go back” button is only active for 10 days following a major feature update. After 10 days, Windows automatically deletes the Windows.old folder to free up hard drive space. If the button is grayed out, you cannot use this method and must rely on a System Restore point or a clean OS installation.
3. Can I roll back Windows 11 to Windows 10 without losing data?
Yes, but only within the strict 10-day window immediately after upgrading. Using the “Go back” method in System Recovery will safely downgrade you to Windows 10 while keeping your files. Beyond 10 days, returning to Windows 10 requires a clean installation, which will wipe all data on the primary drive unless manually backed up.
4. Is it safe to interrupt a system rollback?
Absolutely not. Forcing a shutdown or losing power during a system rollback or system restore can cause catastrophic corruption to the Windows registry. This often results in a completely unbootable system that requires a full formatting and clean installation to fix. Always ensure laptops are plugged into wall power before starting.
5. How do I know which update caused my computer’s problems?
Check your Update history in the Windows Update settings. Compare the installation dates of recent updates (like KB patches) with the exact day your system started experiencing slowdowns, crashes, or peripheral malfunctions.
6. Can I uninstall driver updates the same way?
While you can see driver updates in your Update History, rolling back drivers is handled through the Device Manager. Right-click the Start button, select Device Manager, find your hardware component, open its Properties, navigate to the Driver tab, and click Roll Back Driver.
Sources & References
- Microsoft Support: Recovery options in Windows.
- Microsoft Learn: Windows Update troubleshooting and uninstallation protocols.
- Windows 11 Official Documentation on System Restore and WinRE functionalities.